2019年10月13日

Mint xfce 工具列/視窗按鈕 的設定

Mint xfce 工具列/視窗按鈕,會顯示已開始的 app 視窗,xfce 預設是無法調整順序,即不能拉來拉去,按自己需求排序。
要變更設定,滑鼠按「開始鈕」右鍵,選 [面板]→[面板偏好設定]→[視窗按鈕],如下圖:

可以自定選項。例如 [排序] 改成 [無,允許拖放],即可按自己的順序,拖拉己開啟的 app 來排序。


2019年9月4日

RaspBian Desktop 樹莓派桌面中文化


想讓女兒試用 RaspBian Desktop 樹莓派系統,但中文化一直有些小問題,解決方法記錄如下。


先更新系統
sudo apt update
一定要安裝的中文輸入架構,我慣用 fcitx
sudo apt install fcitx fcitx-ui-classic fcitx-config-gtk
安裝倉頡三、倉頡五、新酷音(就是注意輸入法)
sudo apt install fcitx-table-cangjie3
$ sudo apt install fcitx-table-cangjie5
$ sudo apt install fcitx-chewing

新增 ll 指令
$ alias ll='ls -alh'

安裝開源字形:教育部標準楷書、cwTex圓體
$ sudo apt-get install fonts-moe-standard-kai fonts-cwtex-yen
改變桌面大小
$ lxrandr
$ http://ppa.launchpad.net/nemh/systemback/ubuntu/pool/main/s/systemback/
安裝系統備份 systemback
    http://ppa.launchpad.net/nemh/systemback/ubuntu/pool/main/s/systemback/

Chromium 中文選單
預裝版本:Version 73.0.3683.75 (Developer Build) built on Debian 9.8, running on Debian 9.8 (32-bit)

下載位置:http://mirrordirector.raspbian.org/raspbian/pool/main/c/chromium/


下載這個檔: chromium-l10n_73.0.3683.75-1_deb9u1_all.deb

LibreOffice 中文化
預裝版本:5.2.7.2


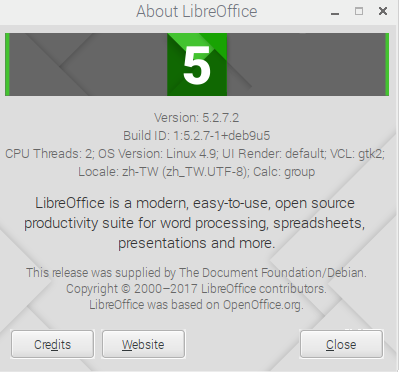
開啟「偏好設定-->Add/Remove Software 」,在蒐尋欄中,填入[Libreoffice],找到「...Chinese Tranditional Language Pack」這個,勾選來安裝,重開 LibreOffice 之後,就 OK 啦!

2019年8月31日

synaptic 在 mint19.x 的快速索引視窗不見了

參見:http://ubuntuhandbook.org/index.php/2019/01/enable-quick-filter-search-box-synaptic-package-manager/

赫然發珼,synaptic 在 mint19.x 的「快速過濾」蒐尋視窗 (Quick filter)不見 了!!!原因是apt-xapian-index 套件被新版的 ubuntu 移除了,重新用指令裝回來即可:

sudo apt install apt-xapian-index

裝完記得更新一下 index
sudo update-apt-xapian-index -vf

重開 sybnaptic 就回來了!

Mint 19.x 的 iso 檔開機,touchPad 不會動?

來源:https://forums.linuxmint.com/viewtopic.php?f=49&t=177632&p=919748&hilit=touchpad+not+recognised#p919748

若你的舊筆電,試用新的 linux disto,觸控 touchPad 不會動時,或許可以試試修改 grub 開機時的指令檔。

不同的 grub 和不同的載入情況可能會有若干差異。像我是用 grub 來載入 iso 檔試用各種作業系統。所以可能修改的是在

/etc/default/grub


/root/grub

或在開機畫面輸按「e」鍵,暫時編輯

若有這行

GRUB_CMDLINE_LINUX=""


改成
GRUB_CMDLINE_LINUX="i8042.noloop"


i8042 是 x86 鍵盤/滑鼠 控制器. 'i8042.noloop' 意指停止 AUX 設備在開機時 loopback 介面的找尋。

2019年8月20日

2019年8月17日

Mint 18.2 開機太慢的可能問題

用 systemd-analyze blame 指令可以查看開機過程,每個程序花的時間 (see https://ubuntuforums.org/showthread.php?t=2391219):

$ systemd-analyze blame
         11.459s apt-daily.service
          3.242s accounts-daemon.service
          2.958s networking.service
          2.761s gpu-manager.service
          2.658s NetworkManager.service
          2.253s apparmor.service
          2.224s dev-sda2.device
          2.204s plymouth-quit-wait.service
          2.198s lightdm.service
          1.853s thermald.service
          1.637s loadcpufreq.service
          1.376s virtualbox.service
          1.236s rsyslog.service
          1.190s upower.service
          1.186s console-kit-log-system-start.service
          1.166s grub-common.service
          1.084s lm-sensors.service
           992ms avahi-daemon.service
           986ms systemd-fsck ....

例如,以上花費時間的排名最多的是 apt-daily.service ,但這是什麼? 從指令名稱表面上來看,就是 debian 系統慣用的軟體安裝和更新 apt 之每日 daily check。這似乎不應該是開機時必要的程序,見 https://ubuntu-mate.community/t/shorten-boot-time-apt-daily-service/12297

下這個指令 sudo systemctl edit apt-daily.timer,貼上以下內容,產生一個文檔 apt-daily timer configuration :

[Timer]
OnBootSec=15min
OnUnitActiveSec=1d
AccuracySec=1h
RandomizedDelaySec=30min


最後按 ^O 寫入、再按^X離開。即完成設定。

重新開機看看囉...

另,若是像 NetworkManager-wait-online.service, 可以試著用「disable」指令把它取消:
sudo systemctl disable NetworkManager-wait-online.service

2019年8月16日

Mint 18.3 下使用 Systemback 還原 liveCD 鋘誤

Systemback (ppa 下載安裝見:https://www.linuxbabe.com/ubuntu/install-systemback-ubuntu-18-04-bionic-18-10) 是從 rematersys  演變出來的 linux 系統備份程式。它最有趣的功能就是備份完的系統,可以將之轉換成可開機的 iso (大小在 4.7 G 以下),拿到別的 PC 機器,直接開機就可以回到你原來備份時灌好的系統。


但在 Mint 18.3 下使用 Systemback, 還原時竟然發現錯誤訊息:

BusyBox v1.22.1 (Ubuntu 1:1.22.0-15ubuntu1) built-in shell (ash)
Enter help for a list of built-in commands.
(initramfs) /cow format specified as aufs and no support found

查了 google,好像是 casper 版本不相容 ( https://bugs.launchpad.net/systemback/+bug/1602683)。
但我試了其中最簡單的方法,就是按「Ctrl+D」就可以跳過這個錯誤啦...


2019年8月11日

Mint 19.2 下的 playonlinux/wine 版本問題

從 Mint 18.2 升級到 Mint 19.2 時, playonlinux 中的舊 win 程式出了問題,不能執行。
查了網,試了後多方法,判斷可能是少了這個: wine32-development

sudo apt install wine32-development

安裝後一開始還是不行,後來把 Wine 版本,從原來的 1.7.34 換成「System」,竟然就 OK 啦!!


2019年8月9日

Mint/ubuntu/linux 下的記憶體測試memtest86:memtester

更換PC記憶體之後,跑記憶體測試 memtest86 或 memtest86+ 有些人應該是有經驗的。一直很好奇 linux 下的指令模式是否有類似的工具。爬了一下文,發現還是有的:memtester。see https://linuxhint.com/check-ram-ubuntu/

在 Mint 18.x 下,下指令即可安裝

$ sudo apt install memtester

使用方法是下指令

$ sudo memtester 1G 2

1G 是指要測試的記憶體大小
2 是指要重覆測試的次數

可以先用指令
free -h

來看可用來測試的記憶體有多大,例如

~$ free -h
              total        used        free      shared  buff/cache   available
Mem:            11G        1.8G        319M        100M        9.4G        9.3G
置換:        4.0G          0B        4.0G


像上面的結果,我有 9.3G 可以用來測試,所以可以分配個 8G 來測試看看,下指令:

$ sudo memtester 8G 2

然後你就可以繼續工作,不用像 memtest86 那樣乾等,而不能使用電腦啦...

測試結果長這樣


2019年8月8日

Mint 18.x xfce 下,用同一螢幕,切換主機 xorg 掛掉

我使用兩台電腦,在Mint 18.x 下,共用同一螢幕,切換主機 xorg 掛掉,回不去。
此時,先按 ctrl+alt+F1 切到 tty1 指令模式,然後下指令關掉 mint 18.2 xfce 的桌面管理程式 lightdm:

sudo service lightdm stop

再重新啟動即可

sudo service lightdm start

注意,別的系統,要查桌面管理程式,下指令:

$ cat /etc/X11/default-display-manager

/usr/sbin/lightdm

表示這 mint 18.x 用的桌面管理是 lightdm


Ubuntu/Mint 指令查 DRAM 的運作資訊:dmidecode

Win 下有不錯的 cpu-z 工具,但 linux 好像沒那麼好用的軟體。改用指令

$ sudo dmidecode -t memory

可以得到以下的顯示結果:
最大支援到 16 GB,下例裝有 4支,每支各2GB,頻率是 1333Mhz
# dmidecode 3.0
Getting SMBIOS data from sysfs.
SMBIOS 2.5 present.

Handle 0x0033, DMI type 16, 15 bytes
Physical Memory Array
 Location: System Board Or Motherboard
 Use: System Memory
 Error Correction Type: None
 Maximum Capacity: 16 GB
 Error Information Handle: Not Provided
 Number Of Devices: 4

Handle 0x0035, DMI type 17, 27 bytes
Memory Device
 Array Handle: 0x0033
 Error Information Handle: Not Provided
 Total Width: 64 bits
 Data Width: 64 bits
 Size: 2048 MB
 Form Factor: DIMM
 Set: None
 Locator: DIMM0
 Bank Locator: BANK0
 Type: Other
 Type Detail: Synchronous
 Speed: 1333 MHz
 Manufacturer: Manufacturer0
 Serial Number: SerNum0
 Asset Tag: AssetTagNum0
 Part Number: PartNum0

Handle 0x0037, DMI type 17, 27 bytes
Memory Device
 Array Handle: 0x0033
 Error Information Handle: Not Provided
 Total Width: 64 bits
 Data Width: 64 bits
 Size: 2048 MB
 Form Factor: DIMM
 Set: None
 Locator: DIMM1
 Bank Locator: BANK1
 Type: Other
 Type Detail: Synchronous
 Speed: 1333 MHz
 Manufacturer: Manufacturer1
 Serial Number: SerNum1
 Asset Tag: AssetTagNum1
 Part Number: PartNum1

Handle 0x0039, DMI type 17, 27 bytes
Memory Device
 Array Handle: 0x0033
 Error Information Handle: Not Provided
 Total Width: 64 bits
 Data Width: 64 bits
 Size: 2048 MB
 Form Factor: DIMM
 Set: None
 Locator: DIMM2
 Bank Locator: BANK2
 Type: Other
 Type Detail: Synchronous
 Speed: 1333 MHz
 Manufacturer: Manufacturer2
 Serial Number: SerNum2
 Asset Tag: AssetTagNum2
 Part Number: PartNum2

Handle 0x003B, DMI type 17, 27 bytes
Memory Device
 Array Handle: 0x0033
 Error Information Handle: Not Provided
 Total Width: 64 bits
 Data Width: 64 bits
 Size: 2048 MB
 Form Factor: DIMM
 Set: None
 Locator: DIMM3
 Bank Locator: BANK3
 Type: Other
 Type Detail: Synchronous
 Speed: 1333 MHz
 Manufacturer: Manufacturer3
 Serial Number: SerNum3
 Asset Tag: AssetTagNum3
 Part Number: PartNum3

解決 fcitx 輸入中文時,不顯示候選字框的方法

在mint 18.2 下,fcitx 輸入中文時,不顯示候選字框的原因,可能是多安裝了一個模組 :fcitx-module-kimpanel。解決辦法是移除它。用指令


$
sudo apt remove fcitx-module-kimpanel


2019年8月2日

memtest86+ 5.01 的 test #7 block move 電腦死當...

買了一組4G DDR3 1600CL, 在 memtest86+ 5.01 測試中, 按 [F2] 使用了多執行緒模式 (SMP mode) 的 test # block move 一直出現電腦死當的情況,而且換上舊有的 2G DDR 1600 (用了很多年, 很少出現異常情形), 讓我起疑是否 memtest86+ 在 SMP mode 下是否仍是實驗性的功能...

經過爬文, 發現似乎網路也有別人遇到此情況: https://forum.canardpc.com/threads/84663-Memtest86-is-freezing-while-running-test-7

之後, 進 memtest86+ 5.01 測試, 就不再出現死機或其它奇怪的錯誤了, 害我以為 DDR ram 有問題, 多花了好幾天的冤枉時間... 謹記供他人參考


2019年7月21日

Mint18:好用的螢幕截圖軟體 deepin-screenshot

這個螢幕截圖軟體 deepin-screenshot,在 ubuntu/mint 下,可以自由畫矩形、圓形、箭號、加文字說明,很好用喔,如下圖。


ubuntu 18.x 以上已包含此套件


see also:Deepin-Scrot – Lightweight Screenshot Capture Program in Ubuntu

像我的是 mint 18.x,只能找舊版的 deb 檔來安裝。不然就是要自已下程式碼來編譯了,參考 這篇「

LinuxMint使用源码安装Deepin-Screenshot

」。


舊版 deb 檔下載:
http://ftp.vim.org/ftp/os/Linux/distr/deepin/pool/main/d/deepin-scrot/

2019年7月19日

使用tar備份資料(ubuntu/mint)

使用tar備份資料(Linux)

資料來源 : http://linux.vbird.org/linux_basic/0240tarcompress.php#tar
範例一:將整個 /etc 目錄下的檔案全部打包成為 /tmp/etc.tar

$ tar -cvf /tmp/etc.tar /etc  <==僅打包,不壓縮!
$ tar -zcvf /tmp/etc.tar.gz /etc  <==打包後,以 gzip 壓縮
$ tar -jcvf /tmp/etc.tar.bz2 /etc  <==打包後,以 bzip2 壓縮

範例二:將 /tmp/etc.tar.gz 檔案解壓縮在 /usr/local/src 底下
$ cd /usr/local/src
$ tar -zxvf /tmp/etc.tar.gz

範例三:將 /etc/ 內的所有檔案備份下來,並且保存其權限
$ tar -zcvpf /tmp/etc.tar.gz /etc

# 這個 -p 的屬性是重要的,特別是當您要保留原本檔案的屬性時!


2019年7月18日

備份軟體 timeshift 在 mint 18 下之還原

備份軟體 timeshift 在 mint 18.3 以後,已成為預裝累積備份/還原軟體。但似乎還無法從 live CD 開機,再還原完整之系統。例如,還原後開機,無法順利進入,畫面出現錯誤如下:

它要我要 root password for maintenance,但 mint/ubuntu 預裝時,根本沒有設 root 密碼!!! (猜應該是目錄權限問題... 不知有無高手知道解決法,已有解方)。

Give root password for maintenance
(or press Control-D to continue):


原來是掛載硬碟的 /etc/fstab 表出了問題。。。因為重新還原後,有可能硬碟重新格式化,而使硬碟的 uuid 改變。主硬碟會重新掛載修正 uuid,但其它的不會,包含 swap。這導致開機出問題,也無法進 root 去修復...

Linux 如何查詢系統硬碟的 UUID

先用 live CD 開機,然後在終端機中下指令,可以查到所有已掛載的硬碟的 uuid

blkid


UUID= 後面的一長串字,就是 UUID,用文字編輯器,例如 gedit 把它們填好如下即可。注意,這個例子,/dev/sda1 是掛在根目錄 /。而 /dev/sda1 是掛 swap。


後來才發現,這篇其實解說了此事:https://askubuntu.com/questions/1149674/timeshift-restore-to-different-partitions

舊版 Linux /etc/fstab說明

/dev/sda1        /                ext3        defaults         1   1
/dev/sda2        /extp            ext3        defaults         1   2
/dev/sdb1
/array           ext3        defaults         1   2
/dev/sda4        swap             swap        defaults         0   0
/dev/cdrom       /mnt/cdrom       auto        noauto,owner,ro  0   0
/dev/fd0         /mnt/floppy      auto        noauto,owner     0   0
devpts           /dev/pts         devpts      gid=5,mode=620   0   0
proc             /proc            proc        defaults         0   0

2019年7月15日

Mint 18: VirtualBox 找不到 USB 裝置

在 Ubuntu/Mint 的 VirtualBox 下,若 guest OS 找不到 USB 裝置時,是沒有把自己加入 vboxuser 群組,所以無權使用。只要把帳號加入即可。

按左下啟動鈕,在「系統」 ->「使用者及群組」->


找到自己的帳號,按管理群:


找到 vboxusers, 按屬性


 在下方的群組成員中,勾選自己,再按「確定」。重新登出/或重開機就OK啦...

Mint 18.2:fcitx 輸入法無法選字

在 Mint 18 中,若要使用 wine (PlayOnLinux) + line (windows版),使用 ibus 輸入法會衝突而無法輸入文字。改用 fcitx 輸入法可以解決這個問題。

但重灌 Mint 18.2 時,卻無法出現候選字視窗 (像這樣)


這時可以用停用 Kimpanel 套件,到 Synaptic 去移除 fcitx-module-kimpanel 即可

2019年7月14日

linux 測硬碟速度指令 hdparm

ubuntu/Mint 下預裝有測硬碟速度指令 hdparm。其用法,例如:

sudo hdparm -Tt /dev/sda
可以測 sda 硬碟速度。

我的 WD 2TB 3.5吋碟,測試結果:

#sudo hdparm -Tt /dev/sda

/dev/sda:  Timing cached reads:   7406 MB in  2.00 seconds = 3704.50 MB/sec
 Timing buffered disk reads: 374 MB in  3.01 seconds = 124.27 MB/sec


我的 128G SSD碟,測試結果:

#sudo hdparm -Tt /dev/sdb

/dev/sdb:  Timing cached reads:   7466 MB in  2.00 seconds = 3734.90 MB/sec
 Timing buffered disk reads: 800 MB in  3.00 seconds = 266.45 MB/sec

===2020/12/28===
A-Data model: SX8200PNP 碟, 測試結果:
/dev/nvme0n1p3: Timing cached reads:   20314 MB in  2.00 seconds = 10168.51 MB/sec Timing buffered disk reads: 8342 MB in  3.00 seconds = 2780.22 MB/sec

2019年6月13日

google drive 同步工具:grive


Grive 指令工具,可以讓Google 雲端硬碟跟本機硬碟中的檔案同步

==grive 2.0的安裝==

用 PPA,參見 Grive2
在 terminal 中下指令:
sudo add-apt-repository ppa:nilarimogard/webupd8
sudo apt-get update
sudo apt-get install grive
 或從 github 自行下載 compile (see grive2)

==grive 的使用參數==

source: http://blog.ilc.edu.tw/blog/index.php?op=printView&articleId=649021&blogId=25793

-v 列出 grive 版本
/usr/local/bin/grive -v
grive version 0.5.1-dev Jun 30 2016 13:33:47

-a 取得授權碼
/usr/local/bin/grive -a

-p 要同步的根目錄,同步到 Google Drive 後,呈現的就是 /home/t850008/Google 目錄下的檔案及目錄
/usr/local/bin/grive -p /home/t850008/Google

-s 單一子目錄同步
/usr/local/bin/grive -s /home/t850008/Google/123

-V 詳細模式,啟用比正常更多的訊息
/usr/local/bin/grive -p /home/t850008/Google -V
config file name "/home/t850008/Google/.grive"
Reading local directories
file .grive_state is ignored by grive
file .grive is ignored by grive
Reading remote server file list
file "/home/t850008/Google/格式工廠 format factory 3.8.0.0 中文免安裝版.exe" is already in sync
Synchronizing files
sync "/home/t850008/Google" already in sync
sync "/home/t850008/Google/pCloud_Windows_3.2.4.exe" deleted in remote. deleting local
sync "/home/t850008/Google/格式工廠 format factory 3.8.0.0 中文免安裝版.exe" already in sync
change stamp is set to 14
Finished!

-l 設定輸入的 log 檔的檔案名稱

-f 強制
/usr/local/bin/grive -p /home/t850008/Google -f

-u 不從 Google Drive 下載檔案, 只上傳本地端有改變的檔案
/usr/local/bin/grive -p /home/t850008/Google -u

-n 只下載 Google Drive 有改變且已存在本地端的檔案,也會上傳本地端的檔案到 Google Drive
/usr/local/bin/grive -p /home/t850008/Google -n

--dry-run 只偵測哪些檔案要處理,並不實際做檔案的上傳或下載
/usr/local/bin/grive -p /home/t850008/Google --dry-run

--ignore 使用 Perl 常規表示式來過濾一些不處理的目錄(針對相對應目錄處理)

-U 限制上傳的速度  kbytes per second
-D 限制下載的速度  kbytes per second

==grive -h==

~ $ grive -h
Grive options:
  -h [ --help ]               Produce help message
  -v [ --version ]            Display Grive version
  -a [ --auth ]               Request authorization token
  -i [ --id ] arg             Authentication ID
  -e [ --secret ] arg         Authentication secret
  -p [ --path ] arg           Path to working copy root
  -s [ --dir ] arg            Single subdirectory to sync
  -V [ --verbose ]            Verbose mode. Enable more messages than normal.
  --log-http arg              Log all HTTP responses in this file for
                              debugging.
  --new-rev                   Create new revisions in server for updated files.
  -d [ --debug ]              Enable debug level messages. Implies -v.
  -l [ --log ] arg            Set log output filename.
  -f [ --force ]              Force grive to always download a file from Google
                              Drive instead of uploading it.
  -u [ --upload-only ]        Do not download anything from Google Drive, only
                              upload local changes
  -n [ --no-remote-new ]      Download only files that are changed in Google
                              Drive and already exist locally
  --dry-run                   Only detect which files need to be
                              uploaded/downloaded, without actually performing
                              them.
  -U [ --upload-speed ] arg   Limit upload speed in kbytes per second
  -D [ --download-speed ] arg Limit download speed in kbytes per second
  -P [ --progress-bar ]       Enable progress bar for upload/download of files


2019年5月21日

移除不必要的字形, Mint 18.2

只留下中日韓英4種語文

移除...像是
Tlwg 泰語系
Lohit 古印語
samyak 印語
kacst 阿語系
padauk 緬語
gargi 印加語
Kalapi 印語
gubbi 印語
Khmer 高棉
Kannada 印語
navilu 古印語
Tibetan 藏文
SMC 馬來文
Bengali 孟加拉文
Punjabi 旁遮普文
。。。(哇,好多呀...)

徹底移除以下套件的指令:


sudo apt-get -y --purge autoremove fonts-beng fonts-beng-extra fonts-deva fonts-deva-extra fonts-gargi fonts-gubbi fonts-gujr fonts-gujr-extra fonts-guru fonts-guru-extra fonts-indic fonts-kacst fonts-kacst-one fonts-kalapi fonts-khmeros-core fonts-knda fonts-lao fonts-lklug-sinhala fonts-lohit-beng-assamese fonts-lohit-beng-bengali fonts-lohit-deva fonts-lohit-gujr fonts-lohit-guru fonts-lohit-knda fonts-lohit-mlym fonts-lohit-orya fonts-lohit-taml fonts-lohit-taml-classical fonts-lohit-telu fonts-mlym fonts-nakula fonts-navilu fonts-noto fonts-noto-hinted fonts-noto-unhinted fonts-orya fonts-orya-extra fonts-pagul fonts-sahadeva fonts-samyak-deva fonts-samyak-gujr fonts-samyak-mlym fonts-samyak-taml fonts-sarai fonts-sil-abyssinica fonts-sil-padauk fonts-smc fonts-taml fonts-telu fonts-telu-extra fonts-thai-tlwg fonts-tibetan-machine fonts-tlwg-garuda fonts-tlwg-garuda-ttf fonts-tlwg-kinnari fonts-tlwg-kinnari-ttf fonts-tlwg-laksaman fonts-tlwg-laksaman-ttf fonts-tlwg-loma fonts-tlwg-loma-ttf fonts-tlwg-mono fonts-tlwg-mono-ttf fonts-tlwg-norasi fonts-tlwg-norasi-ttf fonts-tlwg-purisa fonts-tlwg-purisa-ttf fonts-tlwg-sawasdee fonts-tlwg-sawasdee-ttf fonts-tlwg-typewriter fonts-tlwg-typewriter-ttf fonts-tlwg-typist fonts-tlwg-typist-ttf fonts-tlwg-typo fonts-tlwg-typo-ttf fonts-tlwg-umpush fonts-tlwg-umpush-ttf fonts-tlwg-waree fonts-tlwg-waree-ttf

徹底移除了以下套件:

fonts-beng
fonts-beng-extra
fonts-deva
fonts-deva-extra
fonts-gargi
fonts-gubbi
fonts-gujr
fonts-gujr-extra
fonts-guru
fonts-guru-extra
fonts-indic
fonts-kacst
fonts-kacst-one
fonts-kalapi
fonts-khmeros-core
fonts-knda
fonts-lao
fonts-lklug-sinhala
fonts-lohit-beng-assamese
fonts-lohit-beng-bengali
fonts-lohit-deva
fonts-lohit-gujr
fonts-lohit-guru
fonts-lohit-knda
fonts-lohit-mlym
fonts-lohit-orya
fonts-lohit-taml
fonts-lohit-taml-classical
fonts-lohit-telu
fonts-mlym
fonts-nakula
fonts-navilu
fonts-noto
fonts-noto-hinted
fonts-noto-unhinted
fonts-orya
fonts-orya-extra
fonts-pagul
fonts-sahadeva
fonts-samyak-deva
fonts-samyak-gujr
fonts-samyak-mlym
fonts-samyak-taml
fonts-sarai
fonts-sil-abyssinica
fonts-sil-padauk
fonts-smc
fonts-taml
fonts-telu
fonts-telu-extra
fonts-thai-tlwg
fonts-tibetan-machine
fonts-tlwg-garuda
fonts-tlwg-garuda-ttf
fonts-tlwg-kinnari
fonts-tlwg-kinnari-ttf
fonts-tlwg-laksaman
fonts-tlwg-laksaman-ttf
fonts-tlwg-loma
fonts-tlwg-loma-ttf
fonts-tlwg-mono
fonts-tlwg-mono-ttf
fonts-tlwg-norasi
fonts-tlwg-norasi-ttf
fonts-tlwg-purisa
fonts-tlwg-purisa-ttf
fonts-tlwg-sawasdee
fonts-tlwg-sawasdee-ttf
fonts-tlwg-typewriter
fonts-tlwg-typewriter-ttf
fonts-tlwg-typist
fonts-tlwg-typist-ttf
fonts-tlwg-typo
fonts-tlwg-typo-ttf
fonts-tlwg-umpush
fonts-tlwg-umpush-ttf
fonts-tlwg-waree
fonts-tlwg-waree-ttf

2019年5月19日

讓 linux 終端機輸出英文

linux 的 DM 視窗管理壞掉,往往要按 ctrl+alt+ F1 開啟 終端機下指令,但指令輸出的訊息還是中文,變成亂碼無法辨識。

此時,只要下指令:

export LC_ALL=C

就可以暫時回到英文的 output 了。

2019年5月15日

Mint 18 復原桌面 panel 設定

不小心把 Mint 18 xfce4 的桌面 panel 弄壞了,不是預裝的 Whisker 選單,而是變成 xfce 的原始樣子,找了半天 google,都沒有滿意的答案和做法。

後來姑且亂試:
1. 隨便創建一個新 user1, 登入後發覺是預裝的畫面 (太棒了)
2. 先將自己的桌面 panel 設定備份,例如將

/home/我的帳號/.config/xfce4/

改名成 /home/我的帳號/.config/xfce40/

再將 user1 的桌面 panel 設定複製到自己的目錄下:

   sudo cp -R /home/user1/.config/xfce4/ /home/我的帳號/.config/xfce4/

最後不要忘了將 /home/我的帳號/.config/xfce4/ 這個子目錄改變擁有者,否則你做任何更動,都會回到原點...。請下指令:

      sudo chown  我的帳號:我的帳號 -R  /home/我的帳號/.config/xfce4/

登出,再登入,OK。回到最原始預裝的 whisker 選單了。。。


2019年4月29日

Ubuntu 16.04.5 LTS 的 DNS 更新


在虛擬機中,想更新套件
 sudo apt-get update
得到以下訊息"

錯誤:1 http://security.ubuntu.com/ubuntu xenial-security InRelease
  暫時無法解析 'security.ubuntu.com'
錯誤:2 http://tw.archive.ubuntu.com/ubuntu xenial InRelease
  暫時無法解析 'tw.archive.ubuntu.com'
錯誤:3 http://tw.archive.ubuntu.com/ubuntu xenial-updates InRelease
  暫時無法解析 'tw.archive.ubuntu.com'
錯誤:4 http://tw.archive.ubuntu.com/ubuntu xenial-backports InRelease
  暫時無法解析 'tw.archive.ubuntu.com'
正在讀取套件清單... 完成


應該是 DNS 設置問題,在 ubuntu 12 之後,dns 設計改成由 resolvconf 控制,修改方式是編輯這個檔:

sudo vim /etc/resolvconf/resolv.conf.d/tail

加入一行:

nameserver 8.8.8.8

再重新啟動 resolvconf 即可

sudo resolvconf -u

2019年4月9日

在 Linux 中,建立可開機 Win10 USB

使用WoeUSB為舊版BIOS創建可安裝 Windows 10 的 USB

WoeUSB 是 WinUSB的一個分支,是開源軟體(GPL許可),可在Linux平臺上製作 Windows可啟動USB,

要在Ubuntu 14.04/16.04/17.04上安裝WoeUSB,可以使用以下PPA。 只需打開一個終端視窗並逐個運行以下命令。

sudo add-apt-repository ppa:nilarimogard/webupd8

sudo apt update

sudo apt install woeusb

用完後。 如果您不需要它們,可以從系統中刪除此PPA。用以下的指令

sudo add-apt-repository --remove ppa:nilarimogard/webupd8

sudo apt update

使用上很直觀,如下圖。USB 要先缷載 (不是拔掉喔),它會自動掛載再寫入。